How to Use a Garmin ECHOMAP Ultra 2
To use a Garmin ECHOMAP Ultra 2, start on the chart or sonar screen, adjust the view for current conditions, and save waypoints as you find useful locations. The best settings depend on water depth, bottom detail, light, and whether you're using traditional sonar, ClearVü, or SideVü.
On this page (11 sections)
- How do you start using a Garmin ECHOMAP Ultra 2?
- Which Garmin ECHOMAP Ultra 2 screen should you use?
- How do you adjust sonar settings?
- How do you read fish, structure, and bottom detail?
- How do you use Garmin mapping and navigation?
- How do you save and organize waypoints?
- How do you keep the touchscreen readable?
- Is the Karltys protector compatible with a Garmin ECHOMAP Ultra 2?
- Which protector fits a 10-inch Garmin ECHOMAP Ultra 2?
- How do you update and maintain the unit?
- What is the simplest daily setup?
To use a Garmin ECHOMAP Ultra 2, choose the chart or sonar view you need, set the display for the current conditions, and save useful locations as waypoints. Start with a simple layout, then change sensitivity, range, color, and overlay settings only when the current view does not answer your question.
The ECHOMAP Ultra 2 can feel busy because it combines navigation, traditional sonar, ClearVü, SideVü, and data overlays. Learning one screen at a time makes the controls easier to remember and helps you avoid changing several settings without knowing which one improved the image.
How do you start using a Garmin ECHOMAP Ultra 2?
Start on the chart or a basic sonar screen before adding extra panels. Confirm the transducer, chart source, depth range, and data boxes are showing the information you actually need.
Use the chart when you need position, routes, shorelines, markers, and saved waypoints. Use traditional sonar to watch the bottom below the boat and the water column.
ClearVü helps show detail directly beneath the boat, while SideVü expands the search area to the sides.
If you are new to Garmin sonar, begin with how to read a Garmin fish finder sonar screen before making detailed adjustments. The same basic ideas apply across many Garmin displays, including depth, bottom strength, return history, and screen speed.
Keep the first layout uncluttered. A large sonar panel is easier to read than several small panels when you are learning what each return means.
Which Garmin ECHOMAP Ultra 2 screen should you use?
Use the chart for navigation, traditional sonar for depth and fish arches, ClearVü for detail below the boat, and SideVü for a wider search. Match the view to the question you are asking instead of expecting one screen to show everything equally well.
What does the chart screen show?
The chart screen shows your boat position and nearby map information. Zoom in when you need detail around a waypoint, channel, or shoreline, and zoom out when you need to understand the larger route.
Keep the boat icon moving in the direction you travel. If the chart feels confusing, check the orientation and zoom level before changing other options.
What does traditional sonar show?
Traditional sonar builds a history of returns as the boat moves. The newest information appears at the right side, while older information moves left.
The bottom trace is one of the most useful parts of the screen. A fairly strong, continuous line can indicate a firmer bottom, while a weaker or uneven trace may suggest softer material or changing structure.
Treat the screen as an interpretation aid, not a perfect picture of the bottom.
How should you use ClearVü and SideVü?
Use ClearVü to inspect what lies below the boat and SideVü to search across a broader area. ClearVü is useful after you find a depth change, while SideVü can help locate cover, edges, and objects away from your track.
SideVü images become easier to compare when you keep the boat moving at a steady speed. If the image stretches or compresses, check the boat speed and range before changing sensitivity.
How do you adjust sonar settings?
Change one sonar setting at a time, then watch several screen passes before deciding whether it helped. Sensitivity, depth range, color, and scroll speed all affect what you see, but changing them together makes the result hard to judge.
Start with automatic settings when you are learning the unit. If the screen is crowded with weak returns, lower sensitivity slightly.
If real bottom detail disappears, raise it gradually.
Set the depth range so the bottom remains visible with some space below it. A range that is much deeper than the water can make useful detail occupy too little of the screen.
Use a faster scroll speed when you want the display to keep up with a moving boat. Slow it only when you have a clear reason, such as examining a short section of bottom more closely.
The screen can be harder to read in direct sun or with wet fingers. Adjust brightness and contrast for the conditions, but avoid setting brightness so high that dark returns lose definition.
How do you read fish, structure, and bottom detail?
Look for patterns that continue across several screen passes rather than treating one mark as proof of a fish. Fish arches, dense returns, vegetation, drop-offs, and hard bottom often become easier to understand when you compare them with depth and boat movement.
A fish-shaped arch forms as a target moves through the sonar cone, but the shape can change with speed, beam coverage, sensitivity, and position in the cone. A short mark is not automatically a fish.
Structure often appears as a change in the bottom line or as returns rising above it. Vegetation may show as a taller or uneven area that continues across the screen.
Use ClearVü or SideVü to inspect suspicious areas from another angle.
Keep the depth number visible while reading the image. A strong return at 20 ft means something different from a similar return near the bottom in 80 ft of water.
How do you use Garmin mapping and navigation?
Use the chart to confirm where you are, plan movement, and return to saved locations. Before leaving a launch, check the chart scale, boat position, depth information, and any navigation warnings relevant to your route.
Touch a point on the chart to inspect it or place the cursor there. Zoom in before saving a small target, because a waypoint placed while zoomed far out may be less precise than you expect.
Create a route when you need several connected points. Keep the route simple and review each leg before following it, especially around shallow water, narrow channels, docks, and marked hazards.
A chart does not replace local judgment. Water levels, floating objects, weather, traffic, and unmarked hazards can change the safest path.
How do you save and organize waypoints?
Save a waypoint as soon as you find a location you may need again. Give it a clear name that explains why you saved it, such as “reef,” “drop,” “launch,” or “hazard.”
You can save waypoints for productive structure, safe passages, ramps, anchor spots, and meeting points. Use a naming system you will understand months later, not a string of random numbers.
Before saving, check whether the cursor is on the boat, the structure, or the edge of the area you want to mark. Those are different locations, and the distinction matters when you return.
Review the waypoint on the chart after saving it. If it is in the wrong place, edit or remove it before adding more marks to the map.
How do you keep the touchscreen readable?
Keep the display clean, dry, and protected from scratches while using settings you can still read in bright light. A clear screen makes chart labels, depth numbers, and sonar history easier to inspect.
The Vivelancia protector is made for Garmin EchoMAP Ultra 122SV, 125SV, and 126SV models plus the EchoMAP Ultra 2 122SV, with a 12-inch tempered-glass screen and a 2-count package.
Choose it when your ECHOMAP Ultra 2 uses one of those listed 12-inch models and you want a spare protector available. Its anti-glare and oleophobic coating are aimed at reducing reflections, fingerprints, and oily marks during everyday touch use.
Clean the screen carefully before installation and align the glass slowly. Dust under the protector can affect clarity and touch use, so take your time before pressing it down.
Is the Karltys protector compatible with a Garmin ECHOMAP Ultra 2?
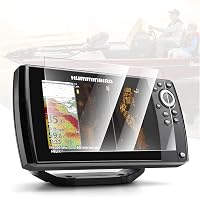
No. The Karltys protector is for specified Humminbird Helix 7 GPS touchscreen models, not Garmin ECHOMAP Ultra 2 units.
It belongs in this comparison only for readers who also use a compatible Humminbird display.
The Karltys protector is a 1-count 9H tempered-glass cover for Humminbird Helix 7 GPS G2, G2N, G3, G3N, G4, and G4N 7-inch touchscreen models.
Choose it only when the device label matches one of those Humminbird Helix 7 models. A protector for the wrong screen size or brand can cover controls poorly, leave edges exposed, or interfere with touch use.
For another Garmin setup guide, see how to use a Garmin STRIKER 4. Its simpler display is useful for learning the basic relationship between sonar history, depth, and boat movement.
Which protector fits a 10-inch Garmin ECHOMAP Ultra 2?
Choose the INNOSURE protector when your unit is one of the listed 10-inch Garmin EchoMAP Ultra or Ultra 2 102SV, 105SV, or 106SV models. Confirm the exact model before installation because 10-inch and 12-inch screens need different protectors.
The INNOSURE package includes 2 tempered-glass protectors and installation kits for the specified Garmin EchoMAP Ultra and Ultra 2 102SV, 105SV, and 106SV 10-inch touchscreens.
Its 9H hardness, high clarity, and fingerprint and smudge resistance suit readers who want to keep a 10-inch touchscreen easier to read. The spare protector can also help if the first installation does not go cleanly.
Measure or confirm the model number before ordering. A protector made for the 10-inch 102SV, 105SV, or 106SV models is not the same choice as one made for a 12-inch 122SV, 125SV, or 126SV display.
How do you update and maintain the unit?
Update the ECHOMAP Ultra 2 when Garmin's instructions call for it, and back up or record important waypoints before making major changes. Use a compatible update method and follow the unit's prompts rather than interrupting power during an update.
Check the power connection, transducer connection, and mounting position if the screen loses depth or shows an unstable image. A loose connection can look like a sonar setting problem.
Keep the display free of salt, dust, and fingerprints with a soft cleaning method suitable for the screen and protector. Avoid pressing hard on the glass when removing dried residue.
For a related Garmin update workflow, read how to update a Garmin 106sv fish finder. If you use a STRIKER Plus unit, how to use a Garmin Striker Plus fish finder covers the same basic path from sonar view to saved locations.
What is the simplest daily setup?
Use the chart for position, traditional sonar for depth, ClearVü for detail below the boat, and SideVü for searching beside the boat. Keep automatic sonar settings at first, then change only the setting that matches the problem you see.
Save waypoints with clear names and review them on the chart before returning to them. Protect the touchscreen only with a cover made for your exact model and screen size.
If you want a simpler Garmin learning path, compare how to use a Garmin STRIKER Vivid 7cv. For the ECHOMAP Ultra 2, the best routine is to keep the display readable, interpret repeated sonar patterns, and use waypoints to turn useful discoveries into organized map information.
Frequently asked questions
How do you use a Garmin ECHOMAP Ultra 2?
Start with the chart, traditional sonar, ClearVü, or SideVü screen that matches your task. Set depth, sensitivity, and display options for the water, then use the cursor to inspect locations and save waypoints for structure, hazards, launches, or productive fishing spots.
How do you read sonar on a Garmin ECHOMAP Ultra 2?
Read the sonar from right to left because the newest returns appear on the right side and move left as the boat travels. The bottom line shows depth and shape, while stronger colored returns can indicate harder targets or stronger echoes; confirm what you see with depth, speed, and nearby structure.
How do you save a waypoint on a Garmin ECHOMAP Ultra 2?
Place the cursor on the location you want to remember, choose the waypoint option, and confirm the position and name. Save practical details in the name or notes when available, such as a reef, hazard, launch, or trolling turn, then check the map before leaving.
What is the difference between Garmin ClearVü and SideVü?
ClearVü shows a picture-like view beneath the boat, while SideVü shows coverage to the sides as well as below. Use ClearVü to inspect what is under your track and SideVü to search wider areas for edges, cover, or structure, then mark useful locations on the chart.