What Is Side Imaging on a Fish Finder? The Short Answer
Side imaging on a fish finder is a sonar technology that lets you see a detailed picture of the water column and bottom to your left and right. It works like a scanner, showing you what’s beside your boat in a wide area. This helps you find fish and understand the underwater structure better.
Think of it as a super-powered flashlight for the underwater world. Instead of just seeing directly below, you get a much wider view of what’s happening around you. Many anglers find it incredibly useful for spotting fish hiding near cover.
- Side imaging shows you areas to the left and right of your boat.
- It uses sonar beams to create a detailed picture of the bottom.
- You can see fish, cover, and bottom structure clearly.
- It helps you cover more water and find fish faster.
Let’s take a closer look at what side imaging means for your fishing trips and how it can help you find more fish.
Understanding Side Imaging on Your Fish Finder
Side imaging sonar gives you a detailed view of the water to the sides of your boat. It’s a big step up from traditional down-looking sonar. You can see things you’d otherwise miss. This technology works by sending out thin, wide sonar beams. These beams sweep the water column and the bottom to your left and right. The echoes bounce back and are translated into a visual image. This creates a picture that looks a bit like a panoramic photograph of the underwater world. You’ll be able to spot fish, submerged structures, and changes in the bottom composition. Many anglers find it helps them cover more water effectively. It’s like having eyes on the sides of your boat.
How Side Imaging Works: The Science Behind the Picture
Side imaging sonar uses special transducers. These transducers send out very narrow, wide beams of sound. Think of them like a scanner. These beams fan out to the sides, covering a large area. As the beams hit objects like fish, rocks, or submerged trees, they bounce back as echoes. Your fish finder then processes these echoes. It turns them into a visual representation on your screen. The image appears as a detailed, almost photographic, view of the bottom and water column. The further away an object is from your boat, the longer the sound wave travels. This is why you often see these images displayed with the boat in the center and the sides extending outward.
The Transducer: The Heart of Side Imaging
The transducer is the key component. It’s typically mounted on the transom of your boat or on a trolling motor. Side imaging transducers have multiple elements. Some elements send out the sonar beams. Other elements receive the returning echoes. This allows for very precise imaging. The beams are shaped to provide both distance and detail. We found that the quality of the transducer can greatly impact the clarity of the image. Higher-end units often have more advanced transducers. This means sharper images and better detection of smaller objects. It’s important to have your transducer mounted correctly for the best performance. Improper mounting can lead to distorted or incomplete images.
Interpreting the Sonar Screen
Reading a side imaging screen takes a little practice. The display typically shows your boat in the center. The water to your left is shown on one side of the screen. The water to your right is shown on the other side. Objects closest to your boat will be near the center. As you move further out on the screen, you are looking at areas further away from your boat. Different colors can represent different types of returns. For example, a hard bottom like rock might show up as a dark line. A school of baitfish could appear as a fuzzy cloud. We’ve found that understanding the color palettes your specific fish finder uses is very helpful. Experimenting with different display settings can also improve clarity.
Understanding the Images
When you first look at side imaging, it can seem a bit overwhelming. You’ll see the bottom contour clearly. You’ll also see variations in bottom hardness. Areas that look dark and solid usually indicate a harder bottom. Lighter or softer areas suggest sand or mud. Submerged objects like logs, rocks, or brush piles will stand out. These are often the places where fish like to hide. You might see what looks like a row of dots or a fuzzy shadow. These could be fish. The size and shape of the return can give you clues about what you’re seeing. Research suggests that practice is the best way to learn how to interpret these images accurately.
Benefits of Using Side Imaging for Fishing
Side imaging sonar offers several advantages for anglers. Its ability to show a wide area at once is a major plus. You can cover more ground quickly. This means less time searching and more time fishing. It’s especially useful for identifying productive fishing spots. You can spot submerged structures that might hold fish. This includes weed beds, rock piles, and drop-offs. You can also see the type of bottom composition. This helps you understand why fish might be in a certain area. Some anglers even use it to find schools of baitfish. This can lead you directly to where the larger predatory fish are feeding.
Finding Fish and Structure More Effectively
One of the biggest draws of side imaging is its ability to reveal fish. You can often see individual fish marked as small arches or dots. They appear to the sides of your boat. If you see a promising piece of structure, you can then steer your boat over it. You can then switch to a down-looking sonar to get a better read directly beneath your boat. This combination of scanning and pinpointing is very effective. We found that being able to see fish suspended off the bottom is a game-changer. Traditional sonar might miss these targets. Side imaging helps you understand the entire habitat. It’s not just about finding a fish; it’s about understanding its environment. This leads to more informed decisions about where and how to fish.
Covering More Water and Saving Time
Imagine fishing a large lake. There are many potential spots to check. With traditional sonar, you’re only seeing directly below. You might pass over a productive area without even knowing it. Side imaging changes this. It lets you scan wide areas to each side. You can cruise along at a moderate speed and get a detailed view of the bottom. This allows you to identify promising areas from a distance. You can then make a note of these spots. Later, you can return and investigate them more closely. This efficiency means you spend less time searching aimlessly. You can focus your efforts on areas that are more likely to produce results. Many experienced anglers report significant time savings using this technology.
Understanding Your Fishing Environment
Beyond just finding fish, side imaging helps you learn about the underwater world. You can see the shape of the lakebed. You can identify drop-offs, humps, and channels. You can also see changes in the bottom material, like transitions from sand to gravel. These features are important for understanding fish behavior. Fish often relate to these changes in depth and structure. For example, baitfish might congregate in a channel. Larger predators might patrol the edges of a drop-off. By understanding these underwater features, you can predict where fish are likely to be. It’s like having a detailed map of the underwater terrain. Some research even suggests that understanding bottom composition can influence lure selection.
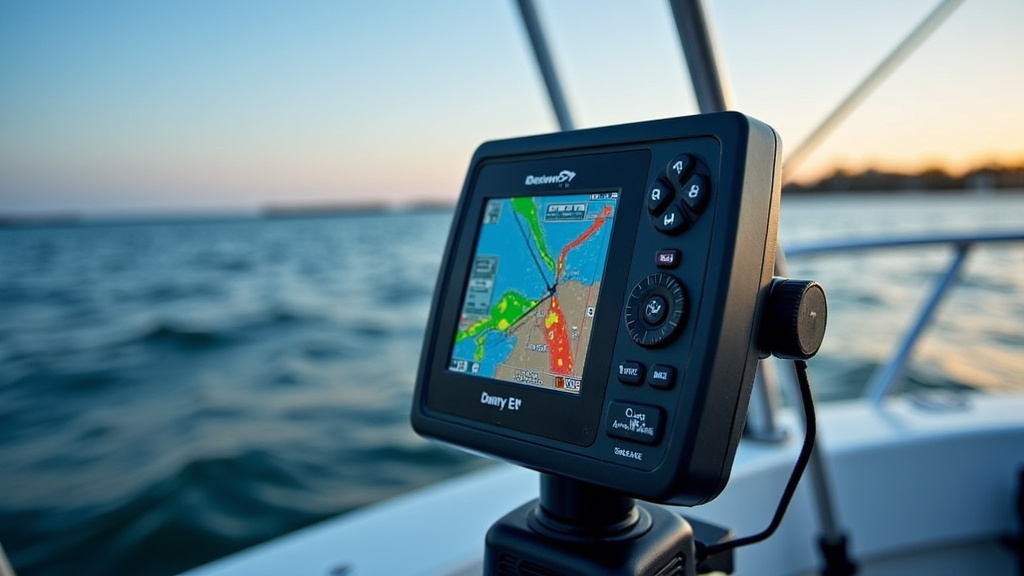
Side Imaging vs. Other Sonar Technologies
It’s helpful to understand how side imaging differs from other sonar types. Traditional sonar, often called 2D or down-looking sonar, shows you what’s directly beneath your boat. It’s good for seeing fish and structure directly below. However, it has a very limited view to the sides. Down-imaging is another type of sonar. It provides more detail than traditional sonar. It shows clearer, more photographic images of what’s directly below. But like traditional sonar, its view is limited to the area beneath the boat. Side imaging is unique because it provides that wide, panoramic view to the left and right. This makes it ideal for scanning large areas and finding fish that are not directly under your boat.
| Sonar Type | Area of View | Image Detail | Best For |
|---|---|---|---|
| Traditional (2D) Sonar | Directly below the boat | Basic identification of fish and structure | General depth finding and basic fish detection |
| Down Imaging | Directly below the boat | High detail, clear images of bottom and objects | Detailed structure and baitfish identification directly below |
| Side Imaging | Wide areas to the left and right of the boat | Detailed panoramic view of bottom and suspended objects | Scanning large areas, finding fish near cover, understanding bottom composition |
Tips for Getting the Most Out of Side Imaging
To truly benefit from side imaging, there are a few key things to keep in mind. First, proper transducer installation is critical. Make sure it’s mounted securely and at the correct angle. Second, experiment with your settings. Your fish finder likely has adjustable frequencies and power levels. Find what works best in your local waters. Third, learn to read the screen. This takes time and practice. Pay attention to how different objects appear. Fourth, combine side imaging with other sonar types. Use it to scan, then switch to down-looking sonar for a closer look. Finally, keep your boat moving at a steady, moderate speed. This helps create the clearest images.
Achieving the Best Image Quality
The quality of your side imaging images depends on several factors. The transducer’s quality and placement are paramount. Also, the water clarity plays a role. In very murky water, sonar beams have a harder time traveling and returning clear echoes. Boat speed is another key factor. Moving too fast can blur the images. Moving too slow might not cover enough ground. Many experts suggest a speed between 3 and 7 miles per hour for optimal side imaging performance. Adjusting the sonar frequency can also help. Lower frequencies penetrate deeper but offer less detail. Higher frequencies offer more detail but have less range. Some units allow you to adjust the intensity of the sonar return. This can help reduce noise and highlight targets.
Practice Makes Perfect: Learning to Interpret
Don’t get discouraged if side imaging looks confusing at first. It’s a skill that develops over time. Start by looking at familiar structures. If you know there’s a bridge piling or a submerged log, try to find it on your screen. See how it appears. Compare it to what you know is there. Over time, you’ll start to recognize common patterns. You’ll learn to differentiate between fish, bait, and bottom structure. We found that reviewing recorded sonar logs is also a great way to learn. You can replay sections and analyze them without the pressure of active fishing. Many online forums and fishing communities also share tips and examples of side imaging screens.
Checklist for Effective Side Imaging Use
- Ensure your transducer is correctly mounted.
- Experiment with different sonar frequencies.
- Maintain a steady, moderate boat speed.
- Learn to interpret color palettes and image returns.
- Practice regularly on familiar waters.
- Combine side imaging with down-looking sonar.
Conclusion
Side imaging sonar is a powerful tool that offers a wider view of the underwater world. You can see much more to the sides of your boat than with traditional sonar. This technology helps you find fish and structure more effectively by scanning large areas. Learning to interpret the screen takes practice, but the benefits for your fishing trips are clear. Start by experimenting with your settings and practicing on familiar waters. You’ll soon be covering more water and understanding your fishing environment like never before.
Frequently Asked Questions
How far to the sides can side imaging see?
The range of side imaging can vary depending on your fish finder model and water conditions. Many units can provide detailed images up to 100-200 feet to each side of your boat. We found that the effective range often decreases in deeper or murkier water.
Is side imaging worth the extra cost?
For many anglers, the ability to scan large areas and find fish hiding near cover makes side imaging well worth the investment. It can significantly reduce searching time and help you pinpoint productive spots faster. You’ll likely cover more water and gain a better understanding of the fish’s habitat.
Can I see individual fish with side imaging?
Yes, you can often see individual fish as small arches or dots on the side imaging screen, especially when they are near the bottom or structure. You’ll also clearly see schools of baitfish. Their appearance depends on their size, depth, and how they relate to the sonar beam.
Do I need a special transducer for side imaging?
Yes, side imaging requires a specialized transducer that has multiple elements designed to send and receive sonar beams to the sides. These transducers are different from those used for traditional 2D sonar or down imaging. Proper mounting is essential for good performance.
How do I know if my fish finder has side imaging?
Check the specifications of your fish finder unit. Side imaging capability is usually clearly stated in the product description. If you’re unsure, look for transducer models specifically labeled for side imaging, such as those found on units with “SI” or “Side Imaging” in their name.