What Is Sonar Sensitivity on a Fish Finder?
Sonar sensitivity on a fish finder is a setting that controls how well your device detects small or faint sonar signals. Think of it like adjusting the volume on your radio; higher sensitivity means you can pick up fainter stations. Adjusting this setting helps you see different-sized fish and structure in the water column.
Getting the right sonar sensitivity setting is key to getting the most out of your fish finder. Too low, and you might miss subtle details. Too high, and your screen can become cluttered with noise. Understanding this setting helps you avoid clutter while still spotting those bites.
- Sonar sensitivity adjusts your fish finder’s ability to detect signals.
- Higher sensitivity picks up fainter returns, like small fish or bait balls.
- Lower sensitivity filters out noise for a cleaner screen.
- Finding the right balance is important for accurate readings.
- It helps you distinguish fish from underwater structures.
Let’s break down what sonar sensitivity means for your fishing trips and how you can fine-tune it for better results.
Understanding Your Fish Finder’s Sensitivity Setting
Your fish finder’s sensitivity setting is more important than you might think. It tells your device how much sonar to listen for. Think of it like adjusting the volume dial on a radio. Turning it up lets you hear fainter signals. Turning it down helps you ignore background noise.
You’re probably wondering why this matters. Well, the right sensitivity helps you see more detail on your screen. This means you can spot smaller fish, bait balls, or even subtle changes in the lakebed. But too much sensitivity can clutter your screen with junk. We want to find that sweet spot!
How Sonar Sensitivity Works
Your fish finder sends out sound waves, called sonar pings. These waves travel through the water and bounce off objects like fish, submerged trees, or the bottom. Your fish finder then listens for these returning echoes.
Sensitivity controls how strong an echo needs to be for your fish finder to show it on the screen. A high sensitivity setting means even weak echoes will be displayed. A low sensitivity setting means only strong echoes will appear.
The Echo Return Process
When a sonar ping hits an object, it bounces back. The time it takes for the echo to return tells your fish finder how deep the object is. The strength of the echo tells your fish finder how large or dense the object is.
Sensitivity plays a direct role in how the strength of these echoes is interpreted. It’s not about changing the sonar ping itself. It’s about how your fish finder decides to display what it hears back. This is why it’s so important for interpreting what you see.
Adjusting Sensitivity: The Balancing Act
Finding the right sonar sensitivity is like tuning a guitar. You want it just right, not too tight and not too loose. If it’s too high, your screen can look like a snowstorm. This is called “noise” or “chum.” It makes it hard to see actual fish or structure.
On the flip side, if it’s too low, you might miss important targets. You could overlook a school of baitfish or a sneaky bass hiding near a log. We want to filter out the junk without losing the good stuff. Many anglers suggest starting with a medium setting and adjusting from there.
When to Increase Sonar Sensitivity
There are times when cranking up the sensitivity can be very helpful. Think about those days when you’re searching for very small fish. This might be when you’re targeting baitfish for live bait. Or when you’re looking for small schools of crappie or perch.
In these situations, you want your fish finder to be as receptive as possible to faint signals. Increasing sensitivity allows you to see these smaller targets that might otherwise be missed. It can also help you detect subtle differences in the bottom contour. You might find a small ledge or drop-off you wouldn’t have seen otherwise.
Spotting Baitfish and Small Targets
One of the best uses for higher sensitivity is finding baitfish. Baitfish often travel in large schools. These schools can create a visible return on your sonar. However, individual baitfish are small.
If your sensitivity is too low, you might not see the school at all. You could also mistake the return for something else, like weedbeds. When you increase sensitivity, you can often see the individual baitfish within the school. This is a clear sign that larger predatory fish might be nearby.
Detecting Subtle Structure Changes
The lakebed isn’t always flat. There are often humps, rocks, or small drop-offs. These can hold fish. Sometimes these features are very subtle and don’t create a strong sonar return.
By increasing sensitivity, you can pick up these fainter returns. This helps you identify areas that might be more productive. You might notice a slight change in the bottom hardness or a small pile of rocks. These are the kinds of details that can make a big difference in finding fish.
When to Decrease Sonar Sensitivity
While high sensitivity has its uses, it can quickly become your enemy. If your screen is filled with random dots and lines, it’s time to turn it down. This “noise” can mask real fish and structure.
Decreasing sensitivity helps filter out these unwanted signals. It makes your sonar readings cleaner and easier to interpret. This is especially important in certain water conditions or when you’re looking for larger fish.
Reducing Screen Clutter and Noise
Water isn’t always perfectly clear. It can have plankton, suspended silt, or other particles. These small particles can reflect sonar signals, creating unwanted noise. This is especially true in very shallow water or in areas with a lot of stirred-up sediment.
Turning down the sensitivity tells your fish finder to ignore these faint returns. It allows you to focus on the stronger signals that represent actual fish or bottom structure. Many experts suggest that a cleaner screen leads to better decisions on where to fish.
When Targeting Larger Game Fish
If you’re after a big catfish, a muskie, or a large bass, you probably don’t need ultra-high sensitivity. These fish create strong sonar returns. Their size means their echoes will be picked up even at lower sensitivity settings.
Focusing on lower settings can help you avoid the clutter that might surround a large fish. You might see the distinct arc of a big bass near cover, for example. Lowering sensitivity can help isolate those bigger targets from smaller baitfish or general noise.
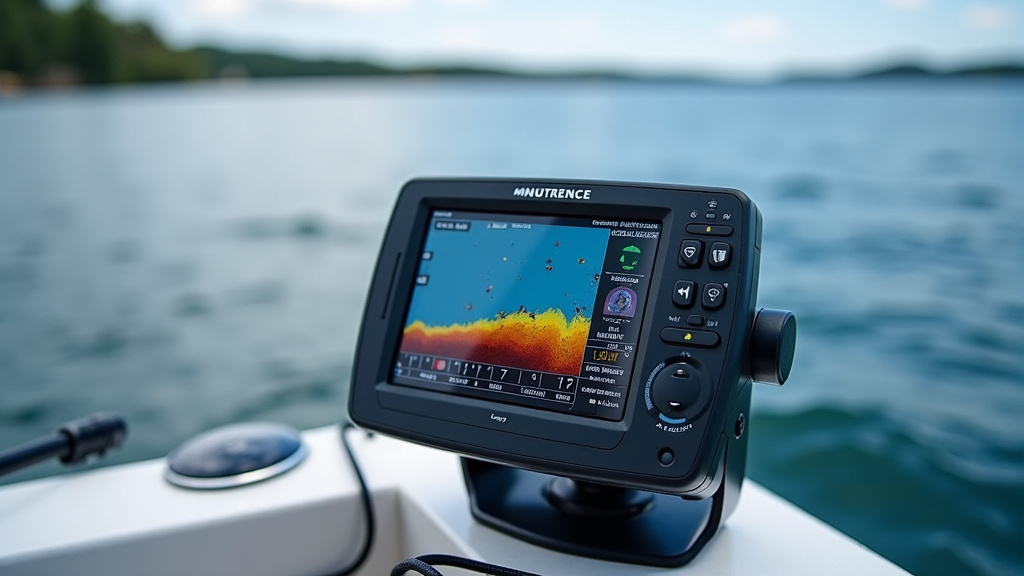
Typical Sensitivity Ranges and Settings
Most fish finders have a sensitivity control. This is often a slider or a dial. You’ll see it labeled as “Sensitivity,” “Gain,” or sometimes “S. Level.” The range usually goes from 0 to 100, or sometimes 1 to 10.
Many finders also have an “Auto” sensitivity setting. This is a good starting point, but manually adjusting it often gives you better results. Auto mode tries to guess what you need. But you know your fishing situation best.
Understanding Auto vs. Manual Settings
Auto sensitivity is designed to be a “set it and forget it” feature. The fish finder analyzes the water conditions and adjusts the sensitivity for you. For beginners, this can be a lifesaver. It prevents you from immediately making things worse.
However, auto mode can sometimes be too aggressive or too conservative. It might boost sensitivity too high in dirty water, causing clutter. Or it might lower it too much in clear water, making you miss subtle targets. Manual control gives you the ultimate say. This is where you can really optimize your sonar readings.
Recommended Starting Points
As a general rule, many anglers start with their sensitivity set around 50-70% on the manual scale. This is a good middle ground. From there, you can adjust up or down based on what you see.
If the screen looks too busy, lower it. If you’re not seeing enough detail, especially for small fish or subtle structure, raise it. We found that water clarity plays a big role. In clear water, you can often use higher sensitivity. In murky water, you’ll likely need to lower it to avoid noise. This is a common piece of advice from experienced anglers.
Tips for Fine-Tuning Your Sensitivity
Adjusting sensitivity isn’t a one-time thing. You’ll want to tweak it as conditions change. This includes water clarity, depth, and the type of fish you’re targeting.
Pay close attention to your screen. What looks like a fish might just be a bit of drifting weed. Learn to distinguish between true targets and false returns. This comes with practice and careful observation. Your fish finder is a tool; your understanding of it makes it useful.
Observe and Adjust Regularly
Make it a habit to check your sensitivity setting throughout your fishing trip. If you move from a clear, deep area to a shallow, murky cove, your optimal setting will likely change.
Watch how the screen changes as you adjust the sensitivity up and down. Try increasing it until you see a lot of noise, then back it off until the noise mostly disappears. Then, try to identify any fish arches or structure returns. This hands-on approach is very effective.
Consider Other Settings Too
Sensitivity isn’t the only setting that affects what you see. Other settings like “Surface Noise Filter,” “Depth Range,” and “Fish ID” also play a role.
Surface noise filters are designed to reduce the clutter from waves and small particles at the surface. Ensure this is set appropriately. Adjusting the depth range can also help. It zooms in on the water column you’re interested in. Sometimes, turning off “Fish ID” and looking at the raw sonar returns (arcs and dots) gives you more information. These settings work together with sensitivity to give you the clearest picture possible.
A Quick Checklist for Setting Your Sensitivity
To help you remember the key points, here’s a simple checklist:
- Start with a medium setting (around 50-70%) if using manual mode.
- Increase sensitivity to find small fish or bait balls.
- Decrease sensitivity to reduce screen clutter and noise.
- Watch for screen “noise” and adjust downward if it appears.
- Keep manual control to fine-tune for specific conditions.
- Remember other settings like surface noise filters can help too.
Conclusion
Mastering sonar sensitivity is key to truly understanding your fish finder. You’ve learned it’s the dial that controls how well your device picks up faint signals, like small baitfish or subtle changes in the lakebed. Finding the right balance means seeing what you need without being overwhelmed by “noise.” This adjustment directly impacts your ability to spot both individual fish and promising structure. Start with a medium setting, observe your screen, and don’t be afraid to tweak it as conditions change. Your next step is to apply this knowledge on your next fishing trip, actively adjusting sensitivity to see what you can discover.
Frequently Asked Questions
What’s the difference between sensitivity and gain on a fish finder?
Often, “sensitivity” and “gain” are used interchangeably on fish finders. They both control how your unit interprets weak sonar returns. Think of gain as the amplification of the signal your fish finder receives. Higher gain means it amplifies weaker signals, similar to increasing sensitivity.
Can I leave my fish finder on Auto sensitivity all the time?
Auto sensitivity is a great starting point, especially for new users. It automatically adjusts the setting for you. However, it might not always be perfect. For the best results, especially when targeting specific fish or fishing in varied conditions, manual adjustment often provides a clearer picture.
Why does my screen look like snow when I turn up the sensitivity?
That “snow” effect is called sonar noise or clutter. It happens when your sensitivity is set too high. Your fish finder is picking up too many faint signals from things like suspended particles, plankton, or even surface chop. Lowering the sensitivity will help filter out this noise and provide a cleaner screen.
How does water depth affect the best sensitivity setting?
In deeper water, your sonar signal has to travel further, and it can weaken. You might need to increase sensitivity to pick up returns from the bottom or fish at greater depths. In very shallow water, signals bounce back quickly and can be strong, so you might need to lower sensitivity to avoid clutter.
Is there a specific sensitivity setting for finding bass?
There isn’t one single sensitivity setting for all bass fishing situations. For targeting larger bass, a lower sensitivity might help you isolate those bigger targets from smaller baitfish. If you’re trying to find smaller schooling bass or baitfish they’re feeding on, you might increase the sensitivity to detect those smaller returns.